Command Line Interface
pip3 install -U otreeoFeedsThis guide instructs you how to deploy one of the oFeeds apps either locally or on a server and how to connect that server to a prolific study. It does not introduce you to oTree per se. If you are interested in creating your own oTree apps, I recommend oTree’s official documentation.
If you want to edit, test and run oFeed’s code locally, you’ll need to install oTree. If you just want want to deploy it on a server, you can skip the first sections and start with Section 2.3 of this chapter.
To run oTree, you need Python3 (and its package manager PIP). In addition, you’ll need some basic experience with command line tools (your terminal) as well as an Integrated Development Environment (IDE) such as PyCharm.
Open your command line interface tool1, that is, the terminal (Mac/Linux) or command prompt (Windows PowerShell) and type:
Command Line Interface
pip3 install -U otreeAfter the command ends, the installation is complete.
oFeedsDownload the .otreezip file of the application you are interested in (that is, oCom, oNovitas, oTweet) from GitHub or OSF.
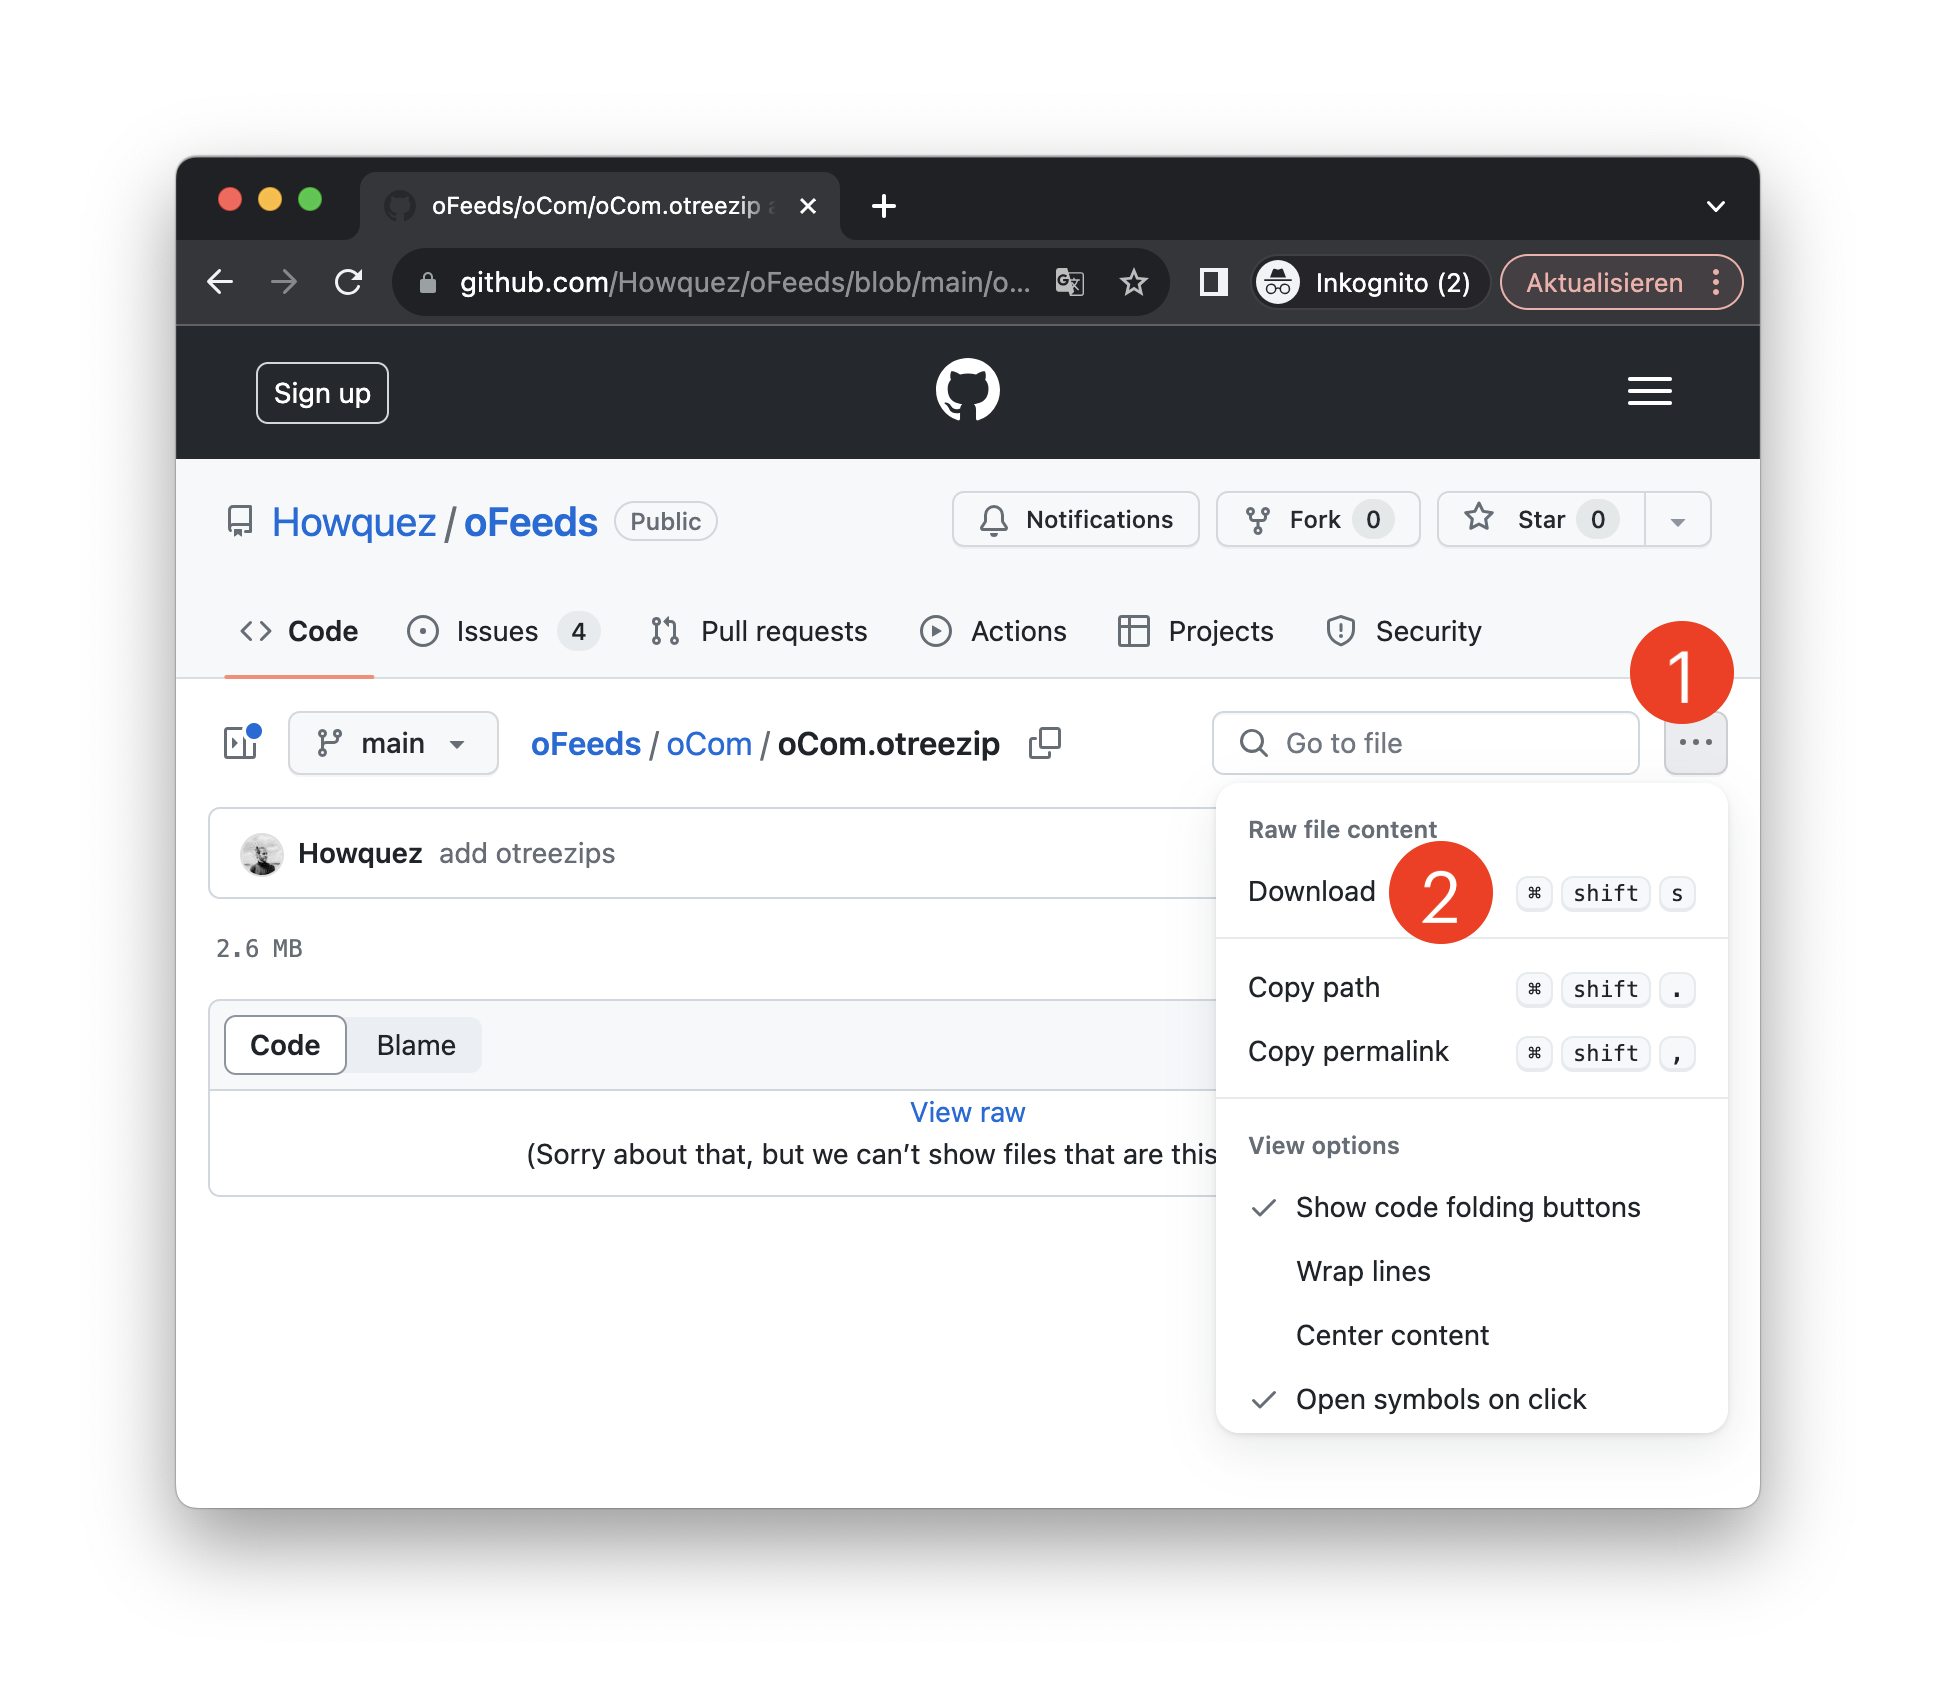
To download the file GitHub, navigate to the respective .otreezip file, first click on ... to trigger a menu where you click on Download as illustrated in the screenshot below.
Open your command line tool and navigate (cd) to your desired directory. Within that directory, unpack the otreezip file you just downloaded (e.g., oTweet.otreezip) using the following command:
Command Line Interface
otree unzip oTweet.otreezipThis upacks the python project which contains predominantly Python code but also some JavaScript, HTML and CSS. You can edit it in your favorite IDE (such as PyCharm). I advice you to consult the oTree documentation if you want to edit the app’s backend as well as the Bootstrap 5.2 documentation if you want to edit the frontend. In addition, the subsequent chapters describe oFeeds’ apps in more detail.
After editing your code, use your command line tool, navigate to the project directory (where a settings.py file is located) and run the following command to re-pack the project into the *.otreezip file again:
Command Line Interface
otree zipYou will need this otreezip file to deploy the project on a server.
oFeeds LocallyUse your command line tool, navigate to your project folder (where a settings.py file is located) and run:
Command Line Interface
otree devserverOpen a browser to http://localhost:8000/. This will display a Demo screen with a hyperlink named after the app you intend to use, e.g., oTweet. Click on it to create a small demo session.
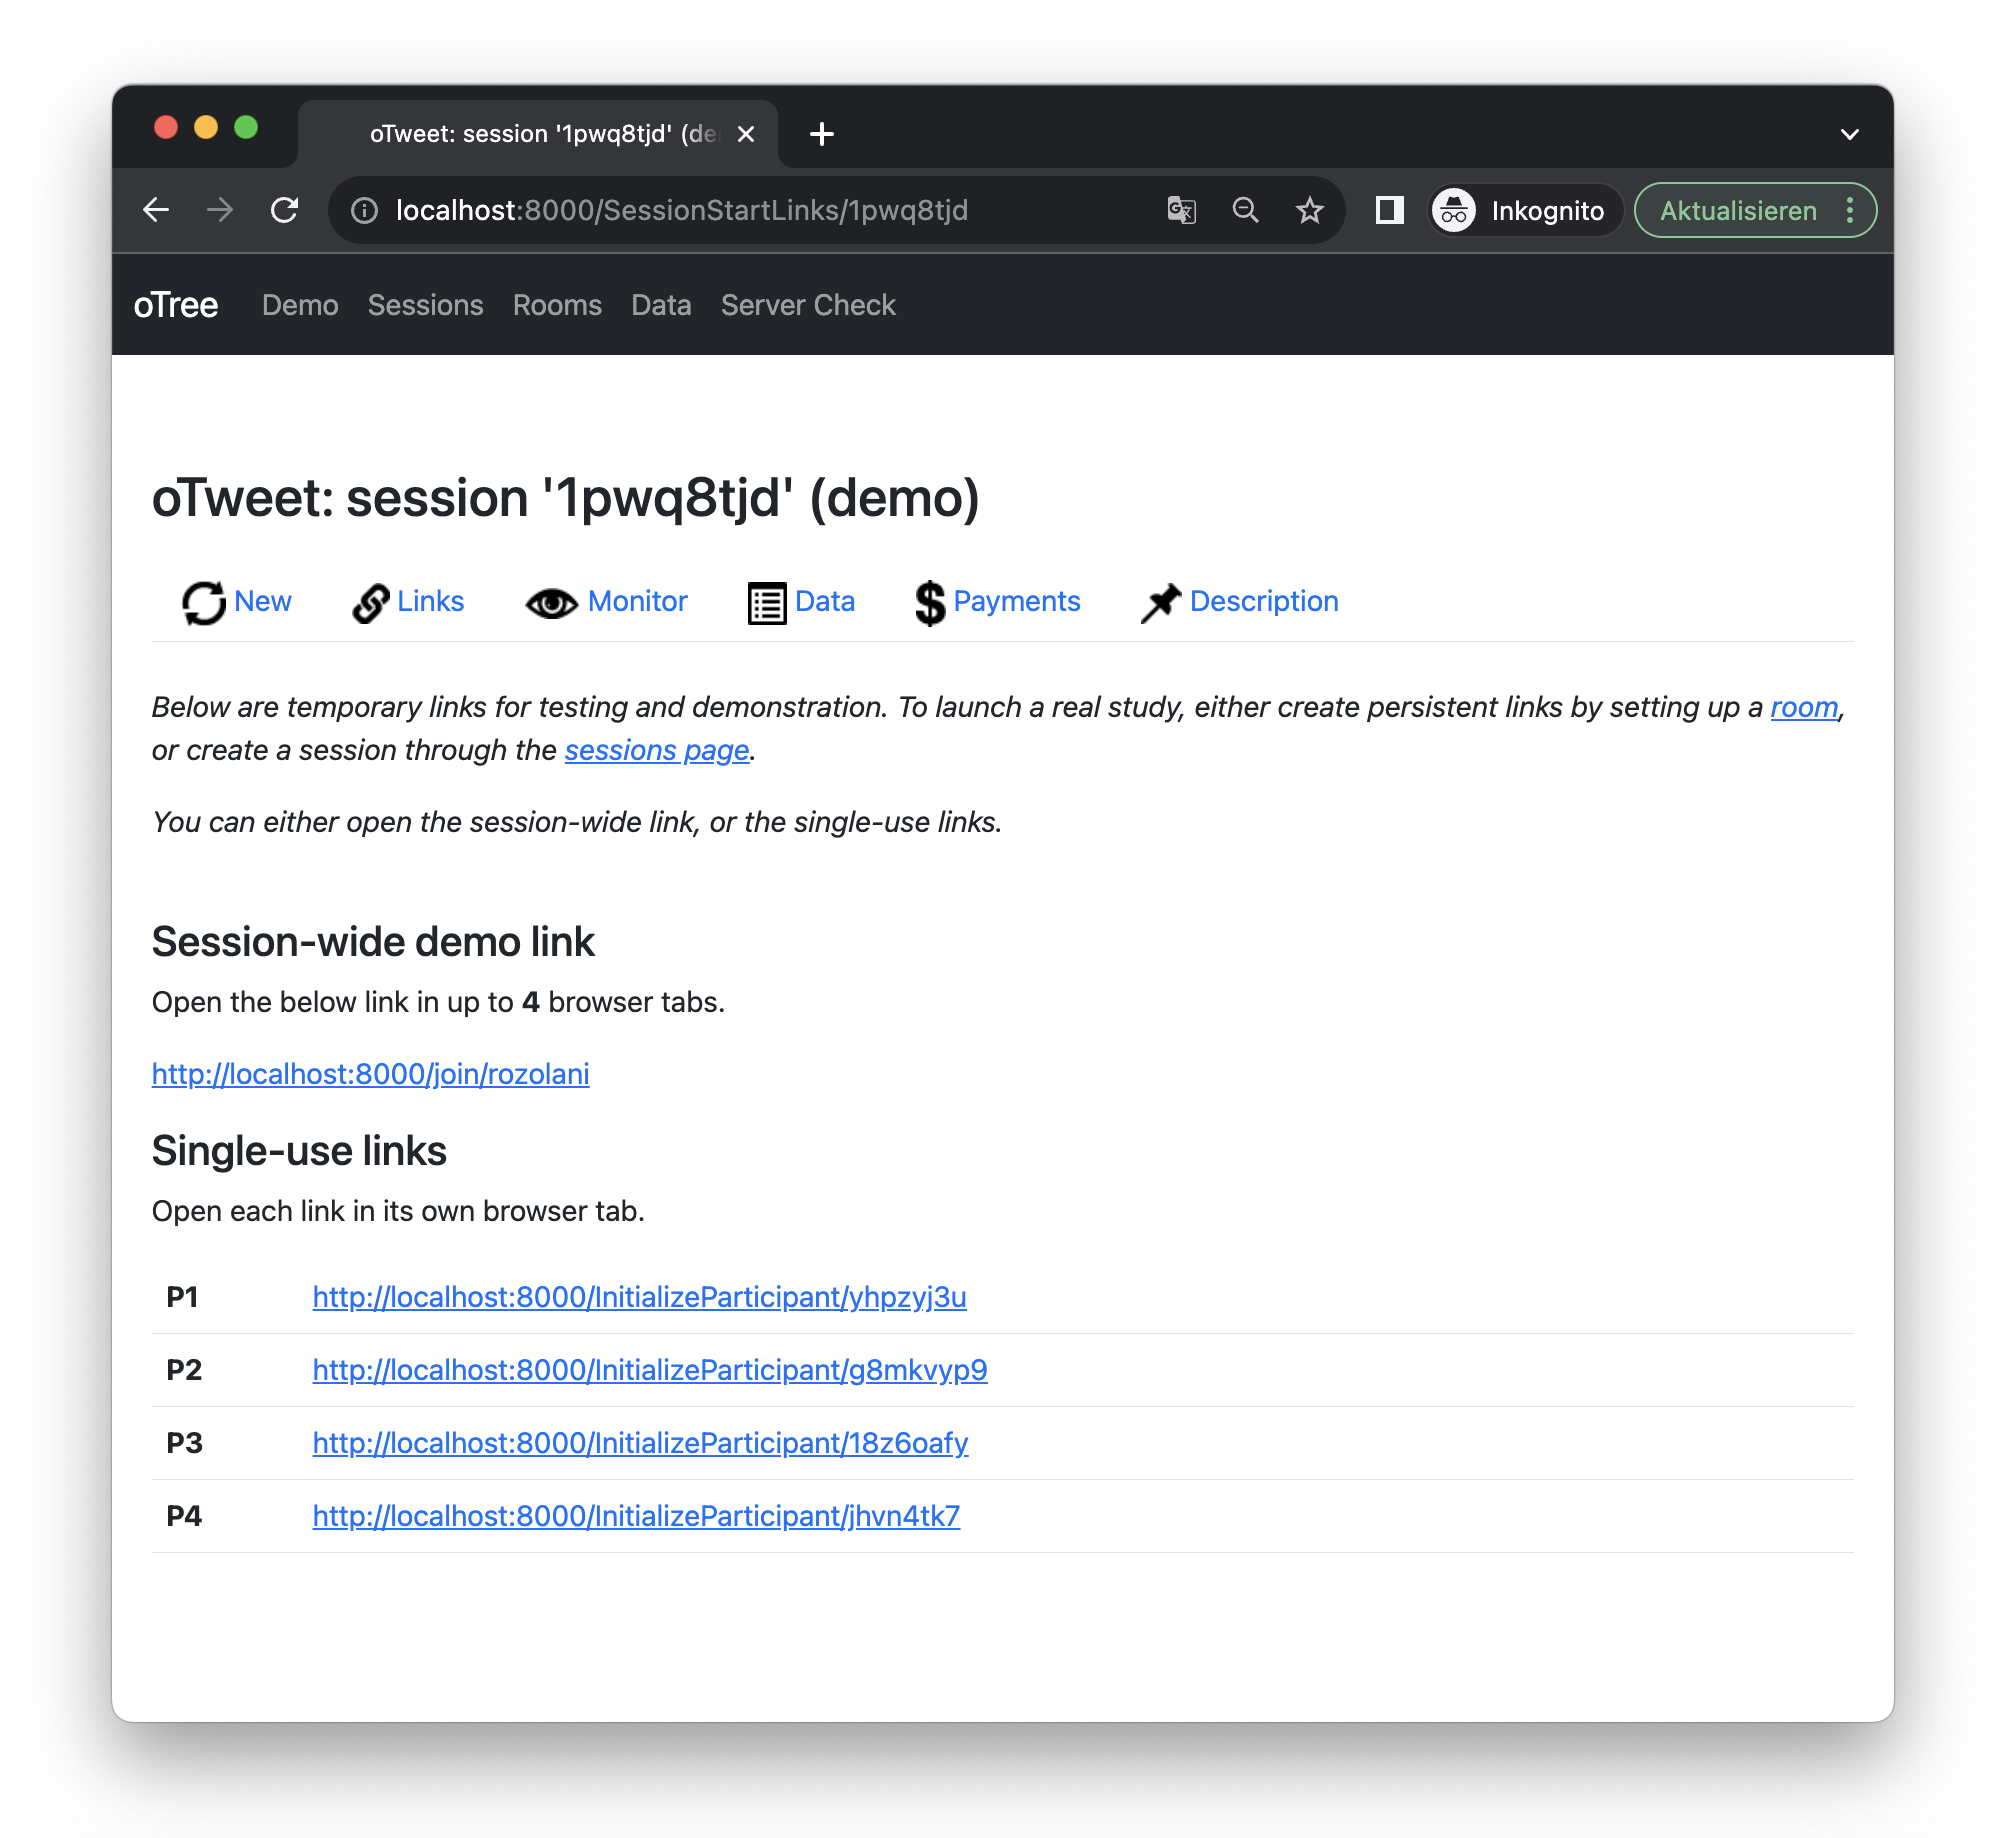 The screenshot above shows such a session (with the unique ID
 1pwq8tjd). You can see unique ULRs for four participants (P1-P4) as well as some horizontally distributed tabs. The Data tab is of particular interest as it shows you the data entries of each participant. It also allows you to download a corresponding *.csv file.
To quit the development setup (devserver), go to the command line tool and press Control+C. Note that oTree’s devserver is not designed for running actual studies.
oFeeds on a ServerTo increase the ease of deployment, oTree’s basic server setup is tied to Heroku. oTree’s official documentation explains that:
Heroku is a commercial cloud hosting provider. It is the simplest way to deploy oTree. The Heroku free plan is sufficient for testing your app, but once you are ready to launch a study, you should upgrade to a paid server, which can handle more traffic. However, Heroku is quite inexpensive, because you only pay for the time you actually use it. If you run a study for only 1 day, you can turn off your dynos and addons, and then you only pay 1/30 of the monthly cost. Often this means you can run a study for just a few dollars.
This implies that you need to set up a Heroku account. In addition, you’ll need an oTree Hub account. oTree Hub automates your server setup and ensures your server is correctly configured. It also offers error/performance monitoring. Just start with the cheapest account and see how far it gets you.
The following steps will guide you through the process. You can (and probably should) also watch this video to get you started.
*.otreezip file. Click on Browse to do so. If you haven’t done so already, you can download the *.otreezip file of the application you are interested in (that is, oCom, oNovitas, oTweet) from GitHub or OSF.Postgres plan (mini), as well asDyno size (Eco),OTREE_AUTH_LEVEL, andOTREE_PRODUCTION off (to display error messages etc.).Postgres plan, larger Dyno size and OTREE_PRODUCTION on.https://[your app name].herokuapp.com. This will yield the same interface as if you tested the study locally on a devserver (described in Section 2.2 of this chapter).The following chapters will describe how to do that for each app individually. (The apps differ slightly with respect to their features, for instance, because the news feed can display two banner ads, while the social media feed can only display one and the shopping feed does not display ads at all. For that reason, the apps’ configurations differ too.)