3 Create a Session
To run or properly test an experiment in oTree, you need to create a session. Sessions also allow you to change some default settings of oFeeds without writing any code. This following paragraphs explain how to create a session and Section 3.1 lists the configurations you can adapt to your needs. Chapter 4, Chapter 5 & Chapter 6 provide a more details for the app-specific configurations.
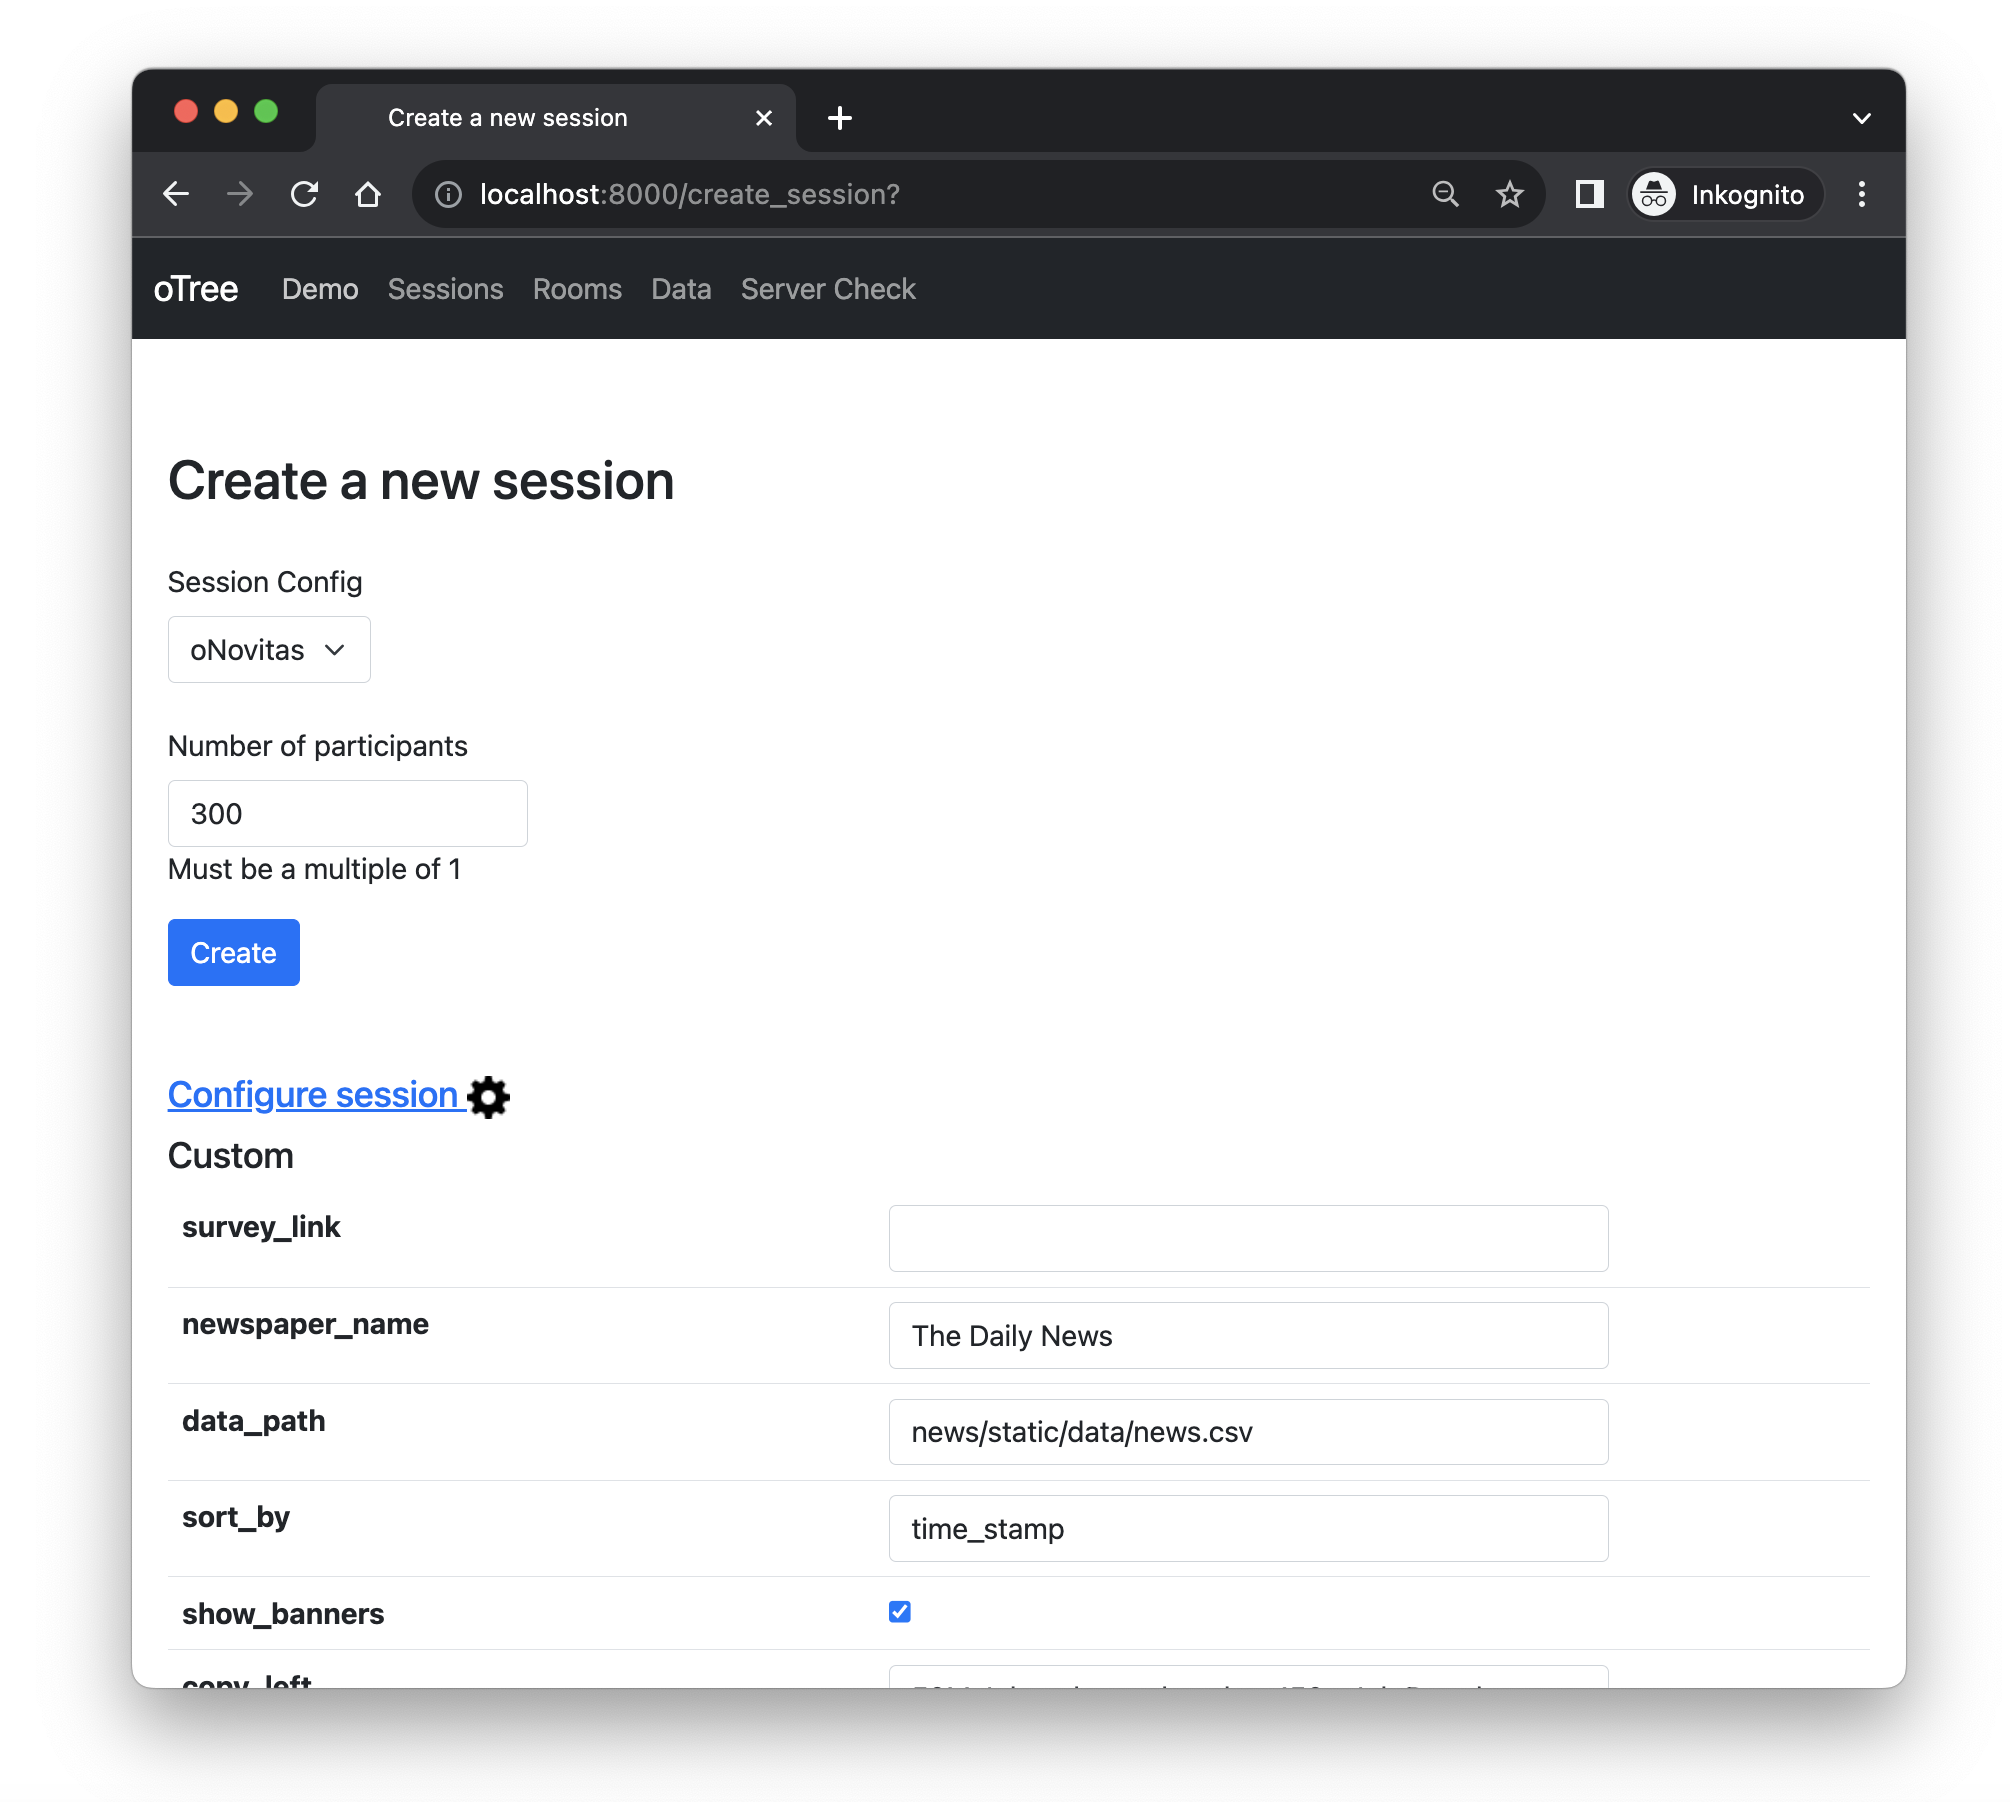
Open the experiment in your browser (either with http://localhost:8000/ if deployed locally for testing purposes or https://[your app name].herokuapp.com if deployed with heroku) and click on Sessions displayed in the header. Subsequently, click on Create new session, and then on Configure session (next to the cogwheel). This yields a screen which looks as follows:

This interface allows you to set the number of rows your data base should contain (e.g., 300 in the example above). This number should be larger than the number of participants you need to finish your study simply because participants who enter your experiment (without finishing it) will use up a row in your data base as soon as they enter the experiment.
3.1 Session Configs
Apart from the number of rows in your data base, the interface provides some custom session configurations that may differ between apps. Each session configuration is listed and explained in the table below. In addition, the table assigns these configurations to their corresponding apps (you can configure a newspaper_name in oNovitas but not in oTweet, for instance).
| Name | Description | Default | oCom | oNovitas | oTweet |
|---|---|---|---|---|---|
real_world_currency_per_point |
1 |
x | x | x | |
participation_fee |
2.10 |
x | x | x | |
survey_link |
https://your-link-here.com |
x | x | x | |
url_param |
'PROLIFIC_ID' |
x | x | x | |
briefing |
<h5>This could be your briefing</h5><p>Use HTML syntax to...</p> |
x | x | x | |
data_path |
x | x | x | ||
sort_by |
'time_stamp' |
x | x | x | |
shop_name |
'oCom' |
x | |||
newspaper_name |
'The Daily News' |
x | |||
search_term |
'#estrava' |
x | |||
show_banners |
True |
x | |||
topics |
False |
x | |||
creative_left |
x | ||||
copy_left |
x | ||||
creative_right |
x | ||||
copy_right |
x | ||||
copy_text |
'50M Jobseekers. <br><br> 150+ Job Boards. <br><br> One Click.' |
||||
show_cta |
True |
x | x | ||
cta_text |
'Post Jobs Free' |
x | x | ||
landing_page |
'https://your-link-here.com' |
x | x |
3.1.1 Common Configs
real_world_currency_per_pointparticipation_feesurvey_linkis used to direct participants to the survey of your choice.url_paramcan be used to pass a participant’s ID to that survey tool. This is essential to merge the data you collect in oTree with the data you collect in your survey tool. If you are using qualtrics, check their documentation on query strings and embedded data to learn more.briefinglets you define information you want to expose your participants to just before they visit the feed. Make sure to format it as HTML.1data_pathaccepts URLs to your Google drive or a raw github link as well as a directory within the project folder. Importantly, all these paths must refer to a;-separated*.csvfile that contains the content you want to display in your feed. You’ll learn more about the specific requirements in the following chapters.- I strongly recommend you to make use of the
sort_byargument. You can pass any column in your data to sort the items of your feed. You can, for instance, create a time stamp or create a random integer (without replacement). This allows you not only to control but also to record the order in which you display. If no value (i.e., column) is provided, the software will shuffle the the feed without recording the order.
3.1.2 App-specific Configs
The subsequent chapters provide more information on how and why to configure these parameters exactly.
3.2 settings.py (Advanced)
If you prefer to edit these settings in your IDE (such as PyCharm), I recommend you to navigate to the settings.py file and edit the SESSION_CONFIG_DEFAULTS. These provide default values, which you can easily overwrite.
If the briefing shall differ between conditions, you can use if-statements using the
{{if player.[your condition]}}...{{else}}...{{endif}}-syntax. InoNovitasyour condition could be something like{{if player.ad_condition == 'A'}}Hi{{else}}Hello{{endif}}.↩︎